

In the previous post, I have shared how you can install the Spark in the window machine. From this post, I will start the basic spark knowledge and will start building the advance spark topic. Most of the examples in this tutorial will be implemented using Pyspark.
To begin the Apache Spark, we will create an RDD using the parallelize method. There are multiple methods to create an RDD. You can create an RDD from an existing RDD or reading the data from the file also. RDD operations are immutable which means that we cannot overwrite an existing RDD but can create a new RDD using the existing RDD. To increase the reusability and to keep memory free, you can use the name of the RDD at the multiple places in your code if you are not referring to the same RDD anywhere in your program. We will discuss this later in the upcoming tutorials. In this tutorial, we are going to start with the basis of the Spark and RDD.
Let’s create an RDD with 10 values. I am using the range function to create the RDD ranging from 0 to 9.
rdd1 = sc.parallelize(range(10))

To print the contents of the RDD, we will use the collect function
rdd1.collect()
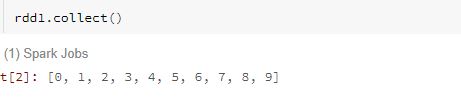
rdd.collect has printed an RDD with the 10 values from 0 to 9. We have used the parallelize functions and if we want to check how many parallel operations or partition parallelize function has created on the RDD we will use glom function
rdd1.glom().collect()

Above RDD has been divided into 8 partitions, partition 1 is having a single value i.e 0 whereas partition 4 is having 2 values. If we want to handle the number of the partition we want to create, we need to pass an extra parameter while creating the RDD which will be a numeric value defining the number of the partition.
rdd2 = sc.parallelize(range(10),3)


Here we have defined the number of partitions as 3, in this scenario, we will be having 3 partitions and the data will be distributed among these partitions. Lets the collect and glom function to the print the data of the RDD
rdd2.glom().collect()

The output clearly indicates that we have 3 partitions, partition 1 and 2 contains 3 records and the partition 3 is having 4 records.
We can create the RDD using the parallelize function.
rdd3 = sc.parallelize([“Welcome to Hadoop Tech!!!”, “This is basic spark Learning”, “Let’s create an RDD”],2 )

print the data of the RDD using the collect function
rdd3.collect()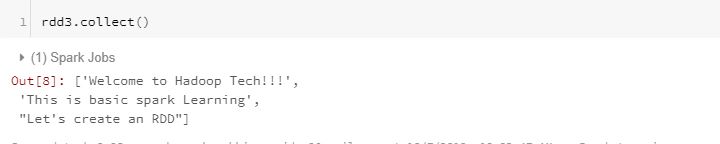
Kindly share your feedback and questions and subscribe Hadoop Tech and our facebook page(Hadoop Tech) for more articles
 hadooptech